La prima cosa che voglio farvi capire è che il nesting automatico e quello semi-automatico funzionano come degli assistenti virtuali, che eseguono il nesting dei pezzi nel modo più efficiente possibile. In teoria è fantastico, ma perché lo sia anche nella pratica, è necessario avere buonsenso e applicare limiti e condizioni in modo che i suggerimenti che il programma fornisce siano il più accurati possibile.
Come avrete già intuito, questi ausili vi aiuteranno a risparmiare tempo e vi eviteranno di dover pensare a come nestare i vostri pezzi uno per uno. E se il tempo è denaro per voi, questo è qualcosa di veramente prezioso.
Entriamo nel dettaglio.
Ora vi spiegherò in dettaglio come utilizzo i diversi ausili automatici disponibili in Lantek.
Utilizzare un nesting salvato.
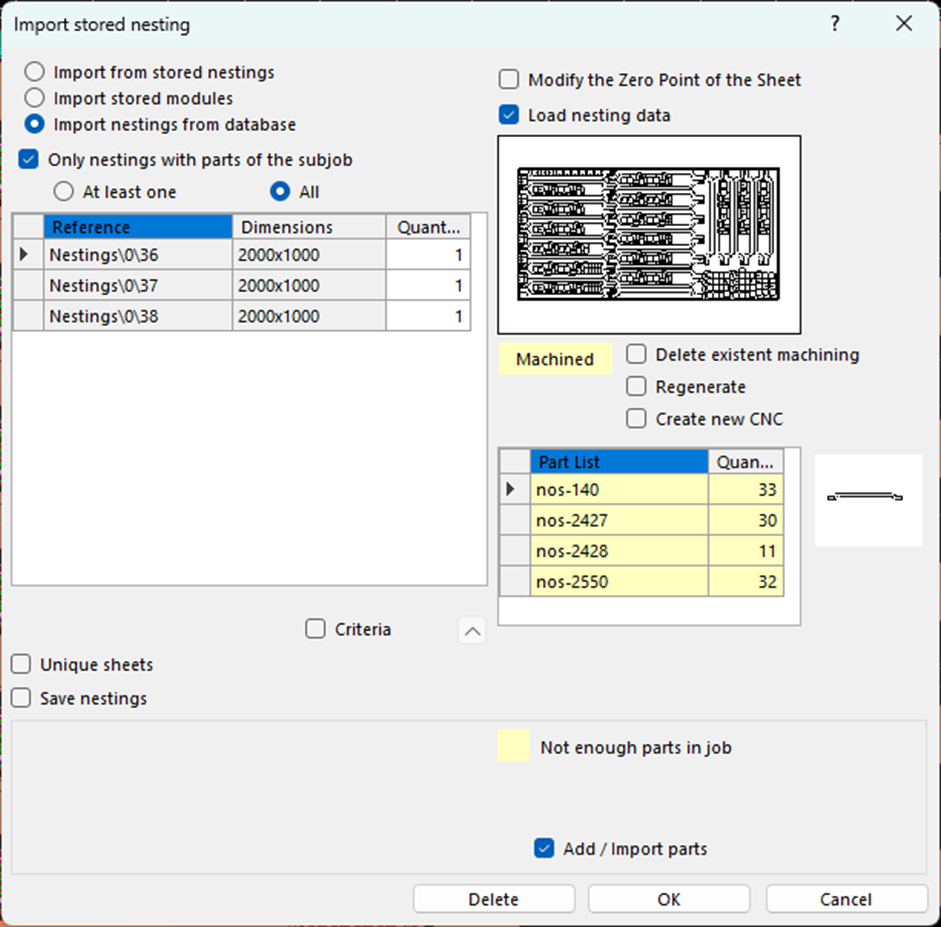
è il primo posto in cui cerco. Una volta selezionati i pezzi su cui sto lavorando e accedendo all´ambiente di nesting, la prima cosa che faccio è controllare se ho un nesting salvato che potrebbe essermi utile. Nel menu “sotto-lavori”, faccio clic sull´opzione “Importare nesting memorizzato”. Se esiste un nesting precedente con gli stessi pezzi, il lavoro è già praticamente fatto. è sufficiente importarlo, scegliere il numero di lamiere che si intende realizzare con quel nesting e definire se si vuole dare priorità al nesting o alla lavorazione.
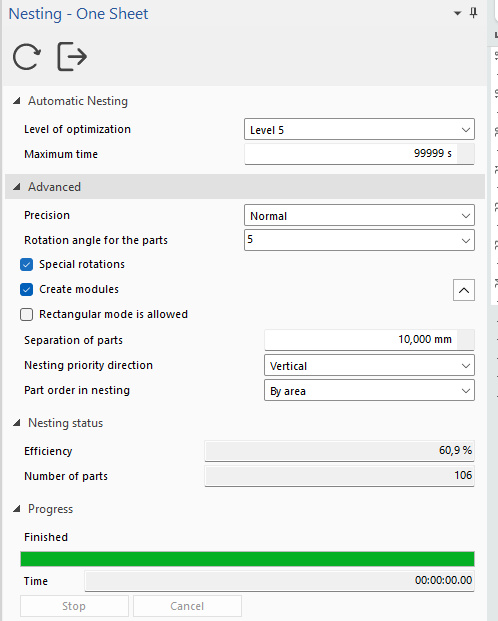
Ausilio automatico.
Se non si ha la fortuna di poter importare un nesting precedente, se ne dovrà creare uno da zero.
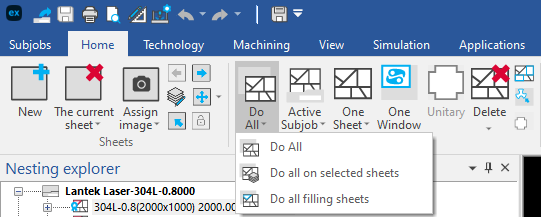
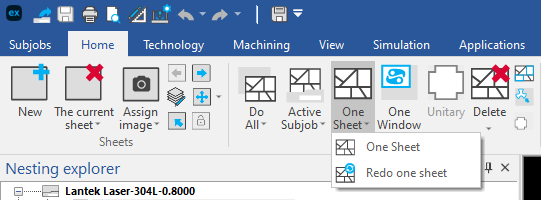
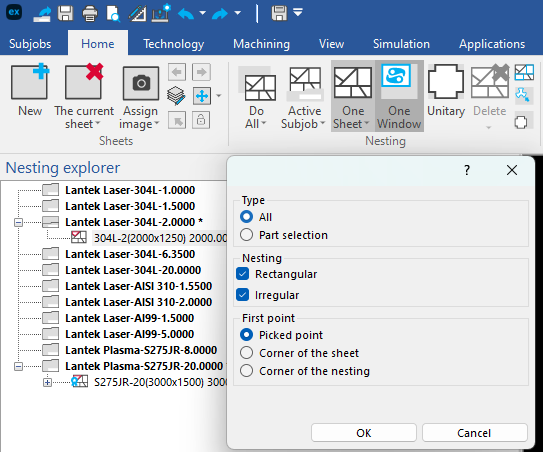
Nel menu Lantek sono disponibili diverse opzioni nel menu “Home”.
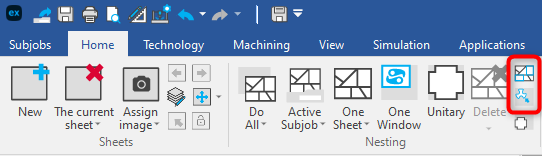
· Fare tutto. Creerà automaticamente il nesting e anche la lavorazione, se è stata pianificata nella configurazione di tutti i sotto-lavori, incluse le diverse macchine, le specifiche della lamiera, i formati (compresi gli scarti che avete a disposizione) e gli spessori.
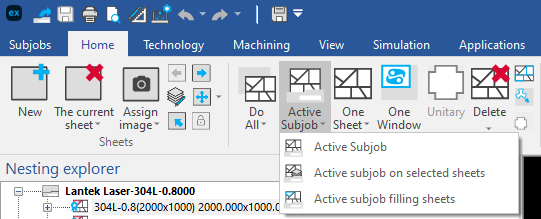
● Creare il sottolavoro attivo: Crea automaticamente il nesting per il sottolavoro attivo (con la stessa macchina, lo stesso materiale e lo stesso spessore della lamiera) che avete selezionato, con tutte le lamiere necessarie che avete in magazzino, fino a quando tutti i pezzi di quel sottolavoro saranno nestati.
Advantages of automatic and semi-automatic nesting aids.
Lantek´s automatic and semi-automatic nesting aids offer you numerous advantages that deserve to be highlighted.
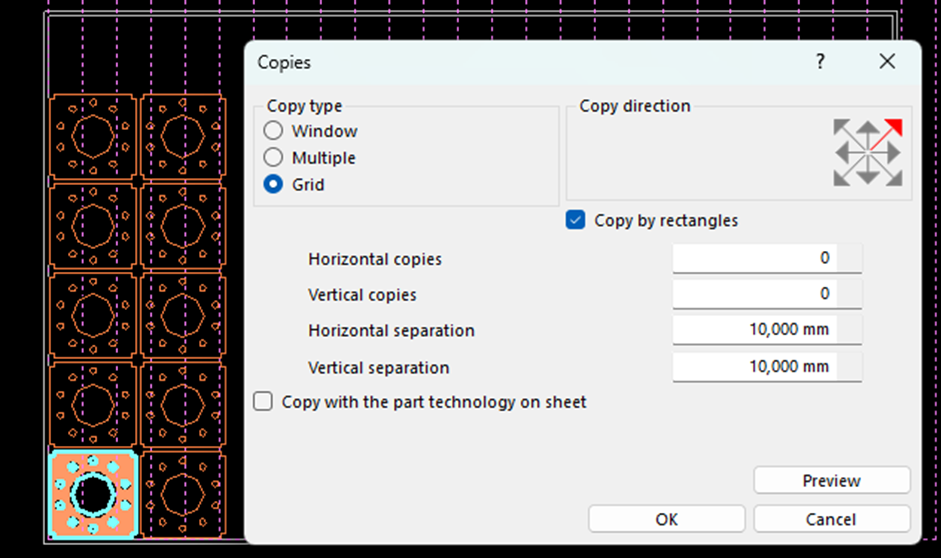
Firstly, thanks to the automatic positioning of the parts, valuable time is saved that was previously dedicated to manually locating, copying and pasting, each one of them onto the sheet. In addition, by having automatic rotation and automatic mirroring of the pieces, you can make the most of the surface of the sheet and avoid waste material as much as possible.
Another benefit of the automatic adjustment of the separation between pieces is that it guarantees adequate space between each of them to avoid collisions and ensure optimal cutting quality.
Finally, the use of these aids significantly reduces the possibility of human error, which translates into greater efficiency in the cutting process and reduced costs.
That´s all.
In my experience, I have noticed that there is a certain tendency to not take full advantage of these functions and continue to do the nesting in a very manual way. It is true that sometimes you think that manual methods may be faster, but after spending some time discovering some of the advantages that Lantek offers, you will become a true fan of these automatic aids.
So, if you are a Lantek user and have not yet tried these functions, I encourage you to do so and, I tell you, that combining these aids with the configuration of hot keys can make your productivity literally explode. But I will explain that to you in future articles which you can read soon.